Physical Camera and Exposure Control in Cinema 4D
About
Here is a quick way of making grass. You need to have at least Cinema 4D Release 9.5 and the Hair plug-in (or the Studio Edition if you are working with Release 12 and up) to follow this tutorial. But similar effects can also be created with the free Hair Department.
Making Grass
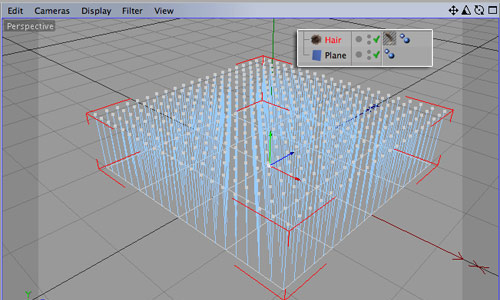
Create a Plane object and press the Add Hair button. This created a new Hair object and a default hair texture will be assigned to it. Leave all hair settings to default for the moment.
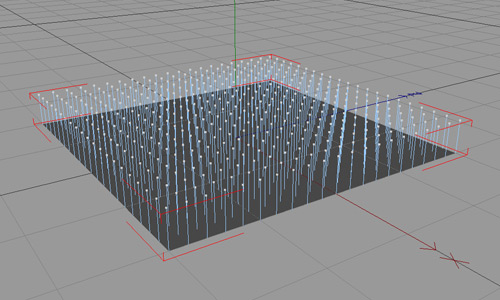
Make sure the Hair object is activated and select the hair scale tool (Hair > Tools > Scale). Use this tool to bring the future grass to the desired length (either by using the tool controls in the attributes manger or by clicking and dragging in the viewport).
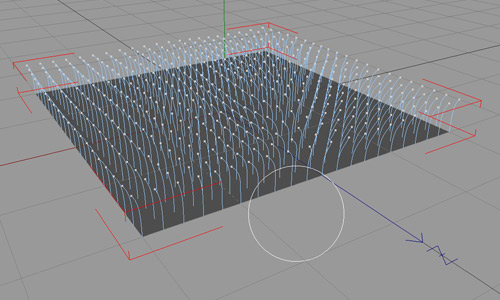
Now select the brush tool (Hair > Tools > Brush). Adjust the radius and bring in some variation in the grass. Make sure to rotate the viewport and work on all sites of the object.
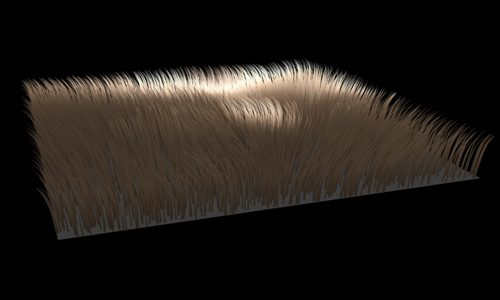
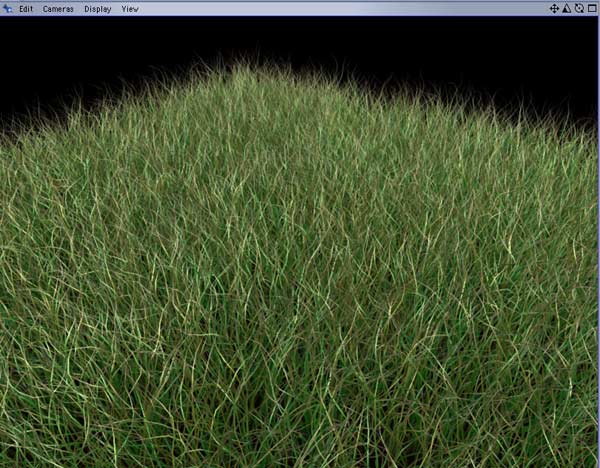
This is it for the 'modeling' :) Now select the hair material. Three channels are activated by default: Color, Specular and Thickness. This is what you should see when you do a quick render of your scene.
Color: Create a brownish-green color gradient. The left side of the gradient will be applied to the grass root, the right part to the tips. If you want your grass to be slightly withered, select a light brown color at the right end. Create some color variation by setting the Var-H and Var-V parameters to something around 10.

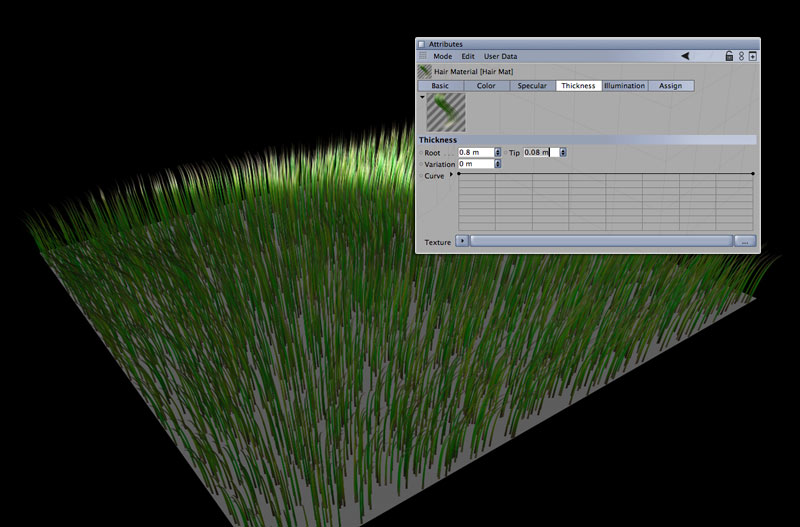
Thickness: The hair still looks to thick, so decrease the Root and Tip values to 0.8 and 0.08.
Scale: At the moment every blade of grass has the same length, which looks to uniform. Activate the Scale channel to bring in some variation. Beware not to confuse the Scale with Length channel. Length cuts the hair which looks to artificial for real grass. You can leave the Scale settings at default. If you want more variation, increase the Variation parameter.
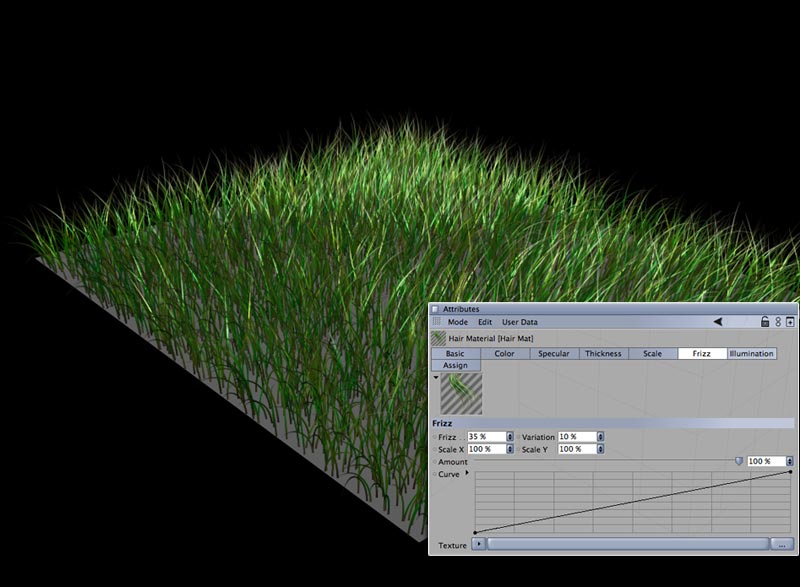
Frizz: Enable this channel to add chaos to your grass. With Frizz you can let your grass bend in any and all directions. Depending on what effect you want to get, use values between 30% and 50%.
Kink: If you want to have even more distortion in your grass, you can also enable the Kink channel and add a little bit of kink to the grass (I used a value of 15%).

That's it for the hair material. Now select your grass object again and go to the Hairs tab. Increase the hair count from 5.000 to something about 50.000. But this value heavily depends on the size of the surface the grass grows on. You can also decrease the Segments to 6. If you do a close-up render and you realized that the grass blades are to angled use higher values.
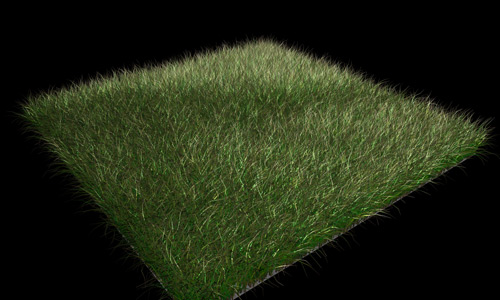
Here is what I get with two light sources and soft shadows. You probably will notice that your grass looks way too dark once you enabled shadows. Therefore, go back to the grass material, Illumination tab and reduce the Self-Shadow and Received Shadow values.
Create a new material and leave only the Color channel activated. Chose a brown color and apply this material to the plane object.