Physical Camera and Exposure Control in Cinema 4D
- About the image
- The modeling
- The textures
- The skin shader
- The scene
- The lighting
- The hair
- Rendering and post production
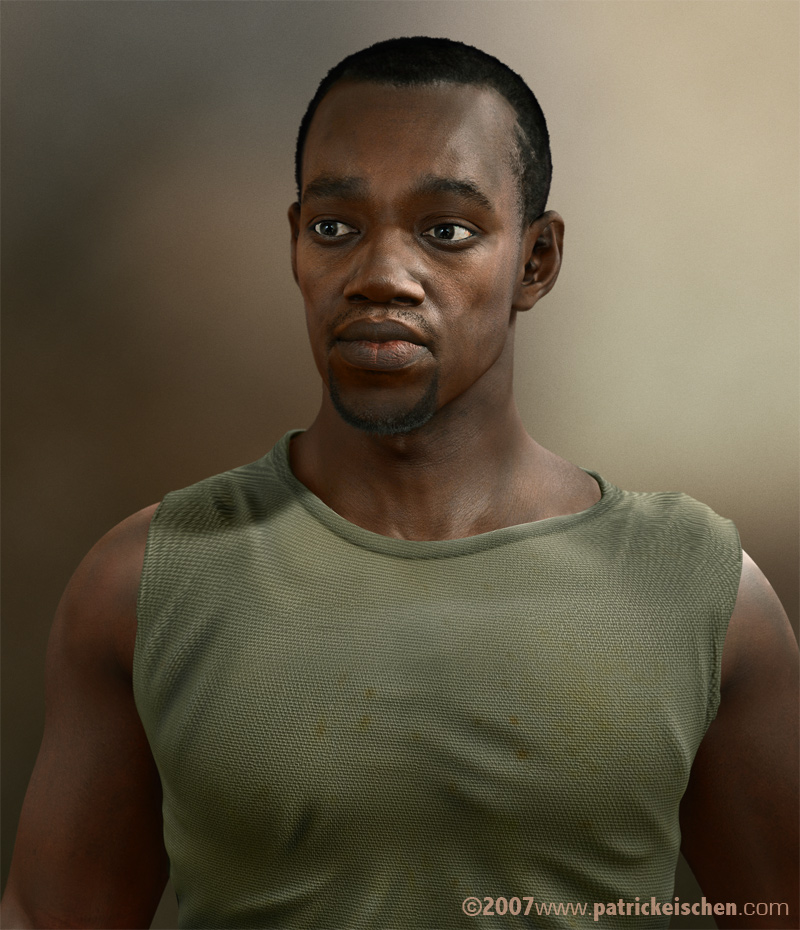
About the image
There are many rendered portraits in a lot of galleries. I was always impressed by the high quality of the MentalRay FastSkin shader and how easy it was to set it up once you understood the basic concept of how skin works. But as I 'only' have Cinema 4D, MentalRay is not an option for me. But isn't it possible to render realistic skin in Cinema 4D? I wanted to find out with this project.
The modeling
I usually start my 3d models with a simple cube (box modeling). I know that many prefer point-by-point modeling (or poly-by-poly) but I like using a cube and 'cutting' the detail in, step-by-step. Box modeling allows me to quickly block out the basic shape of the figure and thus to have a better feeling for the proportions of the model. But because I am using good references, any modeling technique would have worked.

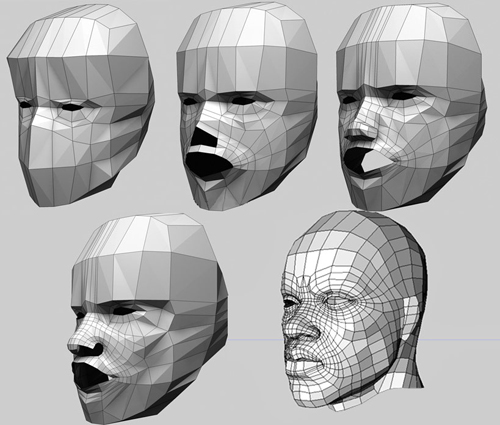
The face finished, I began laying out the UVs (maybe the most annoying part of this job). Fortunately I found UVLayout (by Headus), a free program that flattens 3D geometry automatically. [link]
The textures
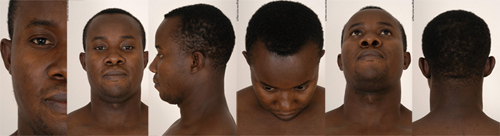
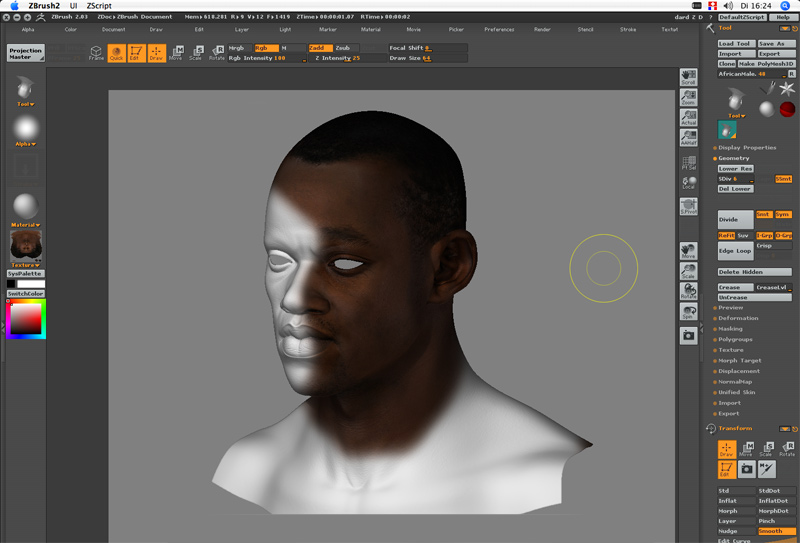
I took the model into ZBrush to add a texture to the face. Every inch of the texture comes from high-resolution photos which where projected onto the model with the ZBrush tools. Wesclei Barbosa has written a tutorial about how to do that. All my reference photos as well as the texture references are from www.3d.sk. [link]
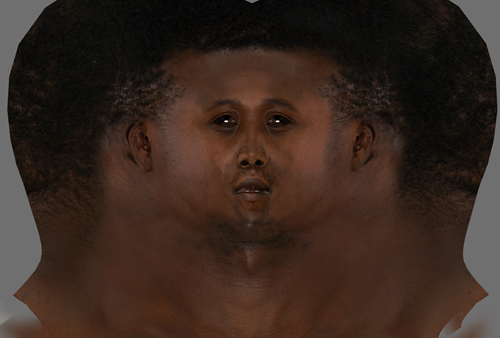
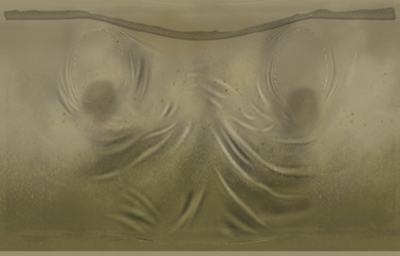
This is how the final head texture looks:
I used this same texture to create the skin details. I turned it into a black & white image and created a mask of it in ZBrush. Now I was able to use the Inflate brush and sculpt all the little skin details. This technique is explained in this video tutorial. I also included some volume for the hair with a custom brush. Finally I created and extracted a displacement map of the head.
The skin shader
Now comes the hardest part: setting up the skin shader. For this image I used the Vreel Skin Shader, a plug-in shader for Cinema 4D that allows you to set up different layers of skin and which also includes a SSS effect. It is possible to setup parameters for secularity, surface and translucent. The shader is loaded in the Luminance channel.
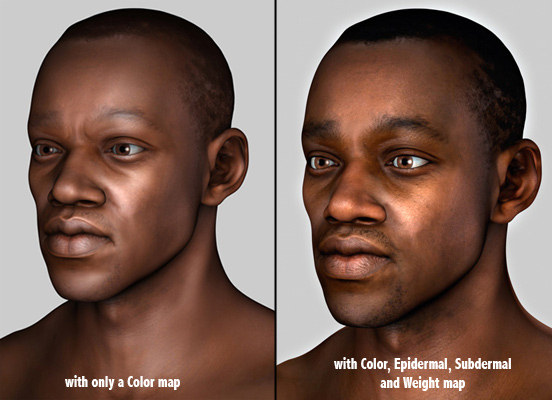
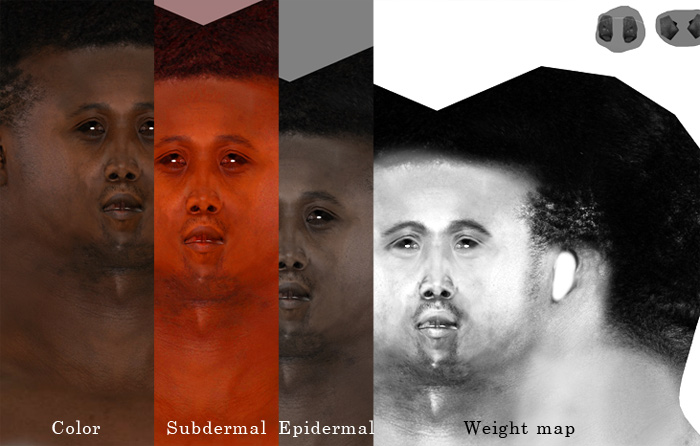
- Color: overall color
- Subdermal: level underneath the skin, saturated version of the overall color map, mostly red with blue vains painted in.
- Epidermal: top-most layer of the skin, should look like the skin is drained of all blood (like a dead body), desaturated version of the overall color map.
- Weight map: This one mixes the subdermal with the epidermal layer, paint in white in areas which should be very translucent (nose, ears, front, mouth)
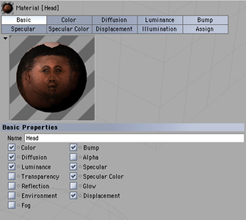
This is how the luminance channel looked like after loading the different maps. The default color map is loaded into the standard Cinema Color channel.
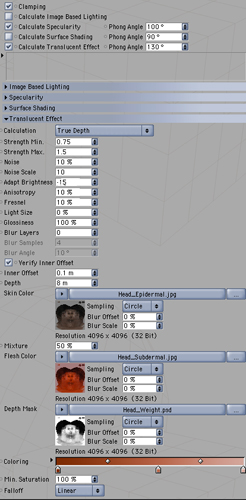
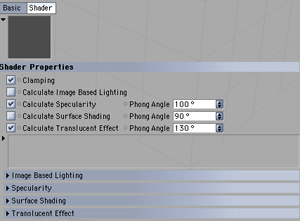
I think the default c4d color channel is much easier to set up, so that's why I left 'Calculate Surface Shading' blank. I used 'Calculate Specularity' to create an even amount of overall brilliance in the skin (see picture below). The standard C4D specularity channel has been used to create nice sharp specs on the edges (e.g. the lips and on the nose). Both specularity channels have been restricted to a map.
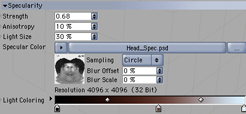
The final skin shader is made up of 6 different channels: Color, Diffusion, Luminance (with the Vreel shader), Bump, Displacement, Specular and Specular Color.
The scene
I quickly modeled a simple shirt, took it into ZBrush, divided it a couple of times and sculpted some cloth wrinkles with the Inflate brush. I also modeled the arms and shoulders and composed everything together in Cinema. There was no need to use displacements on the shirt; I simply exported the high-resolution mesh from ZBrush. I have a lot of memory, so I don't have to worry that my computer might crash. There is almost no difference in render times between the low- and high-resolution shirt.
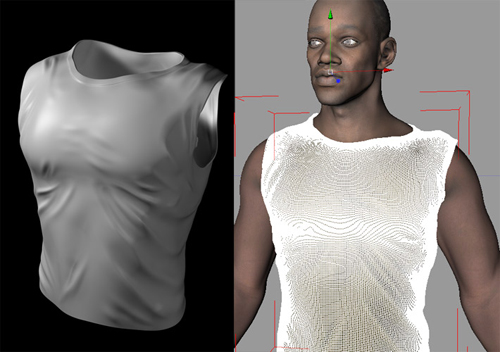
The texture for the shirt has been created by playing around with some filters and by using the 'dodge' and 'burn' tools.
The lighting
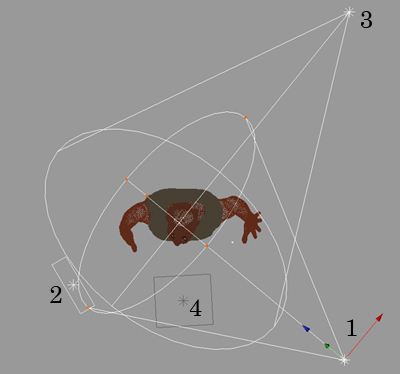
For this image I couldn't use the Global Illumination system because Vreel Skin doesn't work with GI, so I had to use standard Cinema lights. I created a 3-point-lighting with:
- Main Spot @ 115 %
- Fill Area @ 95 %
- Rim Spot @ 190 %
I also include an area light (4) with very low intensity, placed below the model to simulate bouncing light from the bottom. All lights use soft shadows and 'Falloff' is set to 'Inverse Square'.
The hair
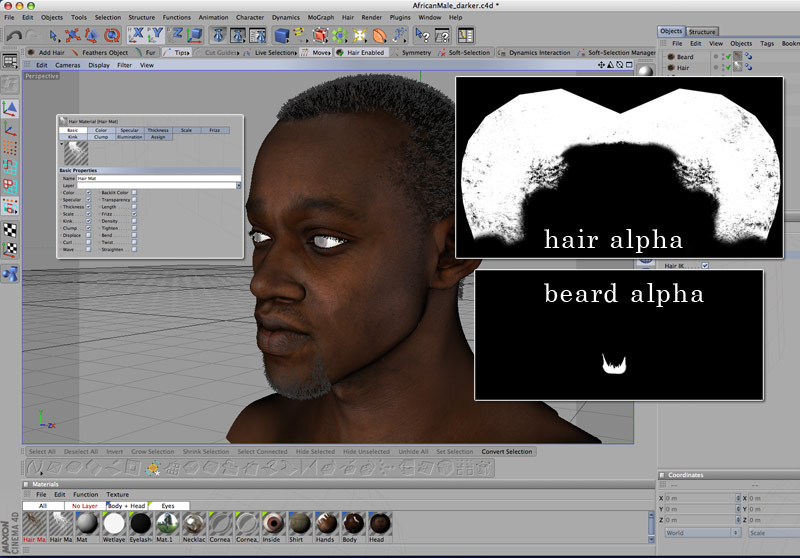
Now comes the funny part: the hairstyle and the beard. I used Cinema's hair module for this job. I created two additional maps: an alpha map for the beard and one for the hair. Both maps were loaded into the 'Density' channel of the hair objects. Unfortunately the density map will not take effect in the editor view. It will only be visible in the final render. So I would suggest setting 'Display' in the 'Editor' tab to 'Hair Lines' if you have enough memory in your computer.

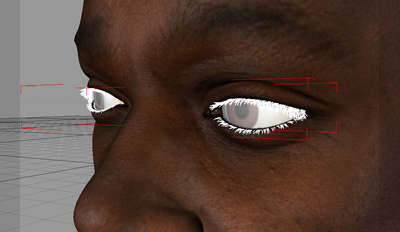
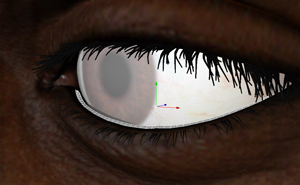
I created eyelashes and a wet layer for the eyes. For the eyelashes I selected an edge loop around the eye, created a spline from it and pressed the 'Add hair' button.
The rendering and post production
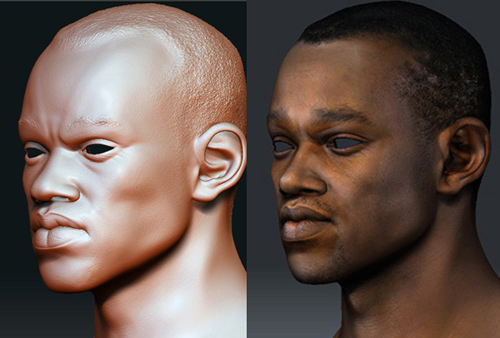
The render with Vreel skin shader and displacement took about 4-5 hours (1h30min without displacement). I rendered the hair and beard in a separate pass and composed both in Photoshop. Further more I rendered an Ambient Occlusion pass and multiplied it over the picture. I wasn't happy with the way the eyes looked, so I copied parts of an eye photograph over the image. I finally did some color correction, applied Gaussian Blur to simulate DOF and added a grain layer. Here is the final image.
Thank you for reading my 'Making of'. I hope it was any help for you. For further questions you can contact me any time.
Keep on rendering!